When you are working in Shopify and need to understand a customer's loyalty status, you no longer have to jump to the JeriCommerce dashboard. The Shopify customer profile can show loyalty details, tier progress, recent loyalty events, and quick actions in the same place where your team already handles customer support.
Loyalty Profile Blocks
Open a customer in Shopify admin and look for the JeriCommerce loyalty blocks on the customer details page.
The blocks give your team a fast read on the customer before they take action:
- Loyalty Information shows the customer's point balance, join date, origin, language, birthday, and whether they have an Apple Wallet or Google Wallet pass installed.
- Loyalty Tier shows current tier points, current tier, next tier, and progress toward the next level.
- Loyalty Events shows recent activity such as points added, points removed, reward redemptions, coupon assignments, push notifications, and wallet pass updates.
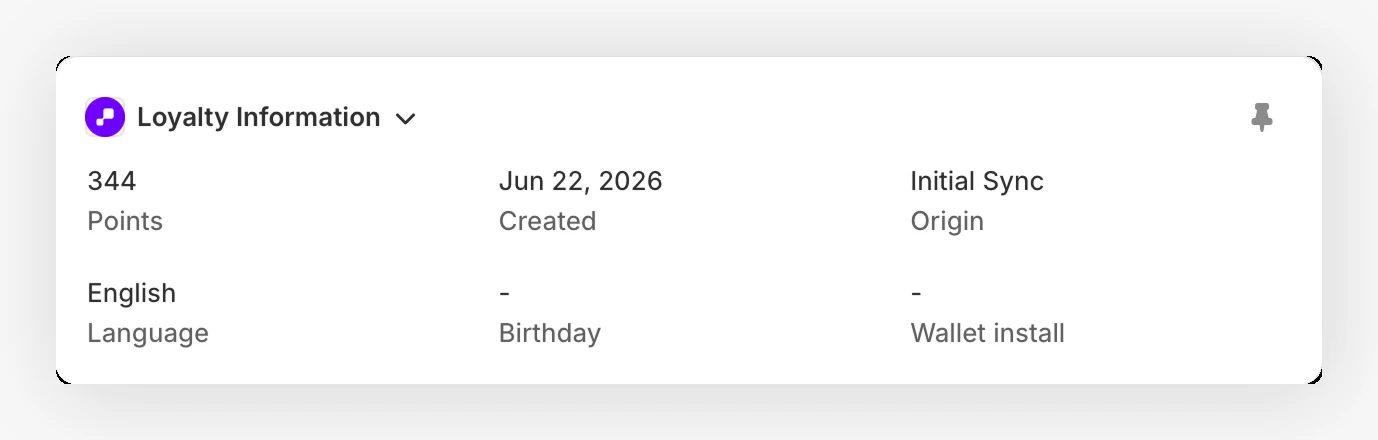
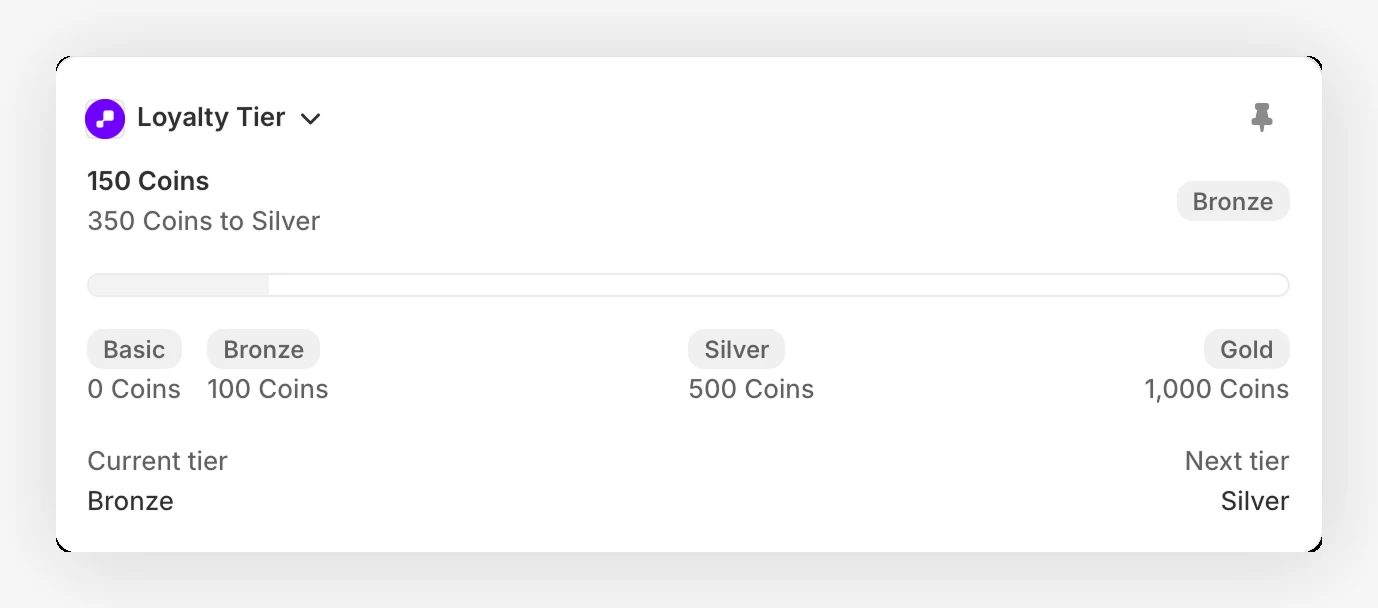
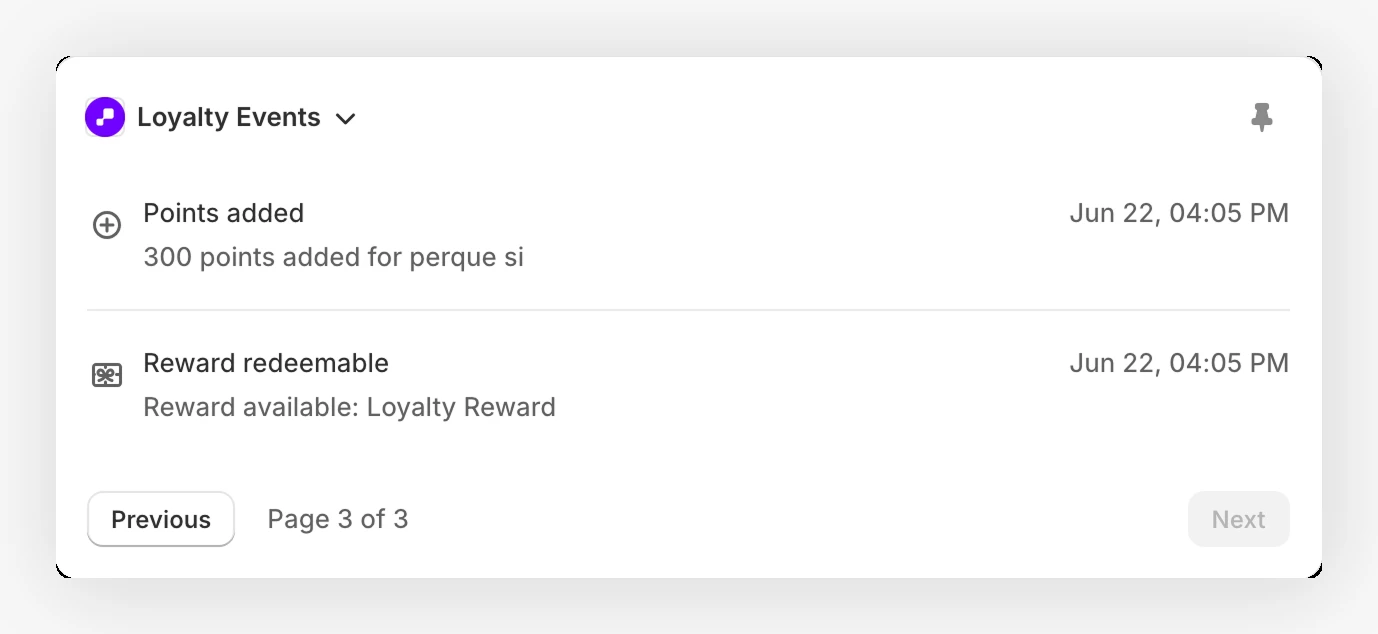
If the selected Shopify customer is not enrolled in your loyalty program, the block shows No loyalty profile instead of empty data.
More Actions Menu
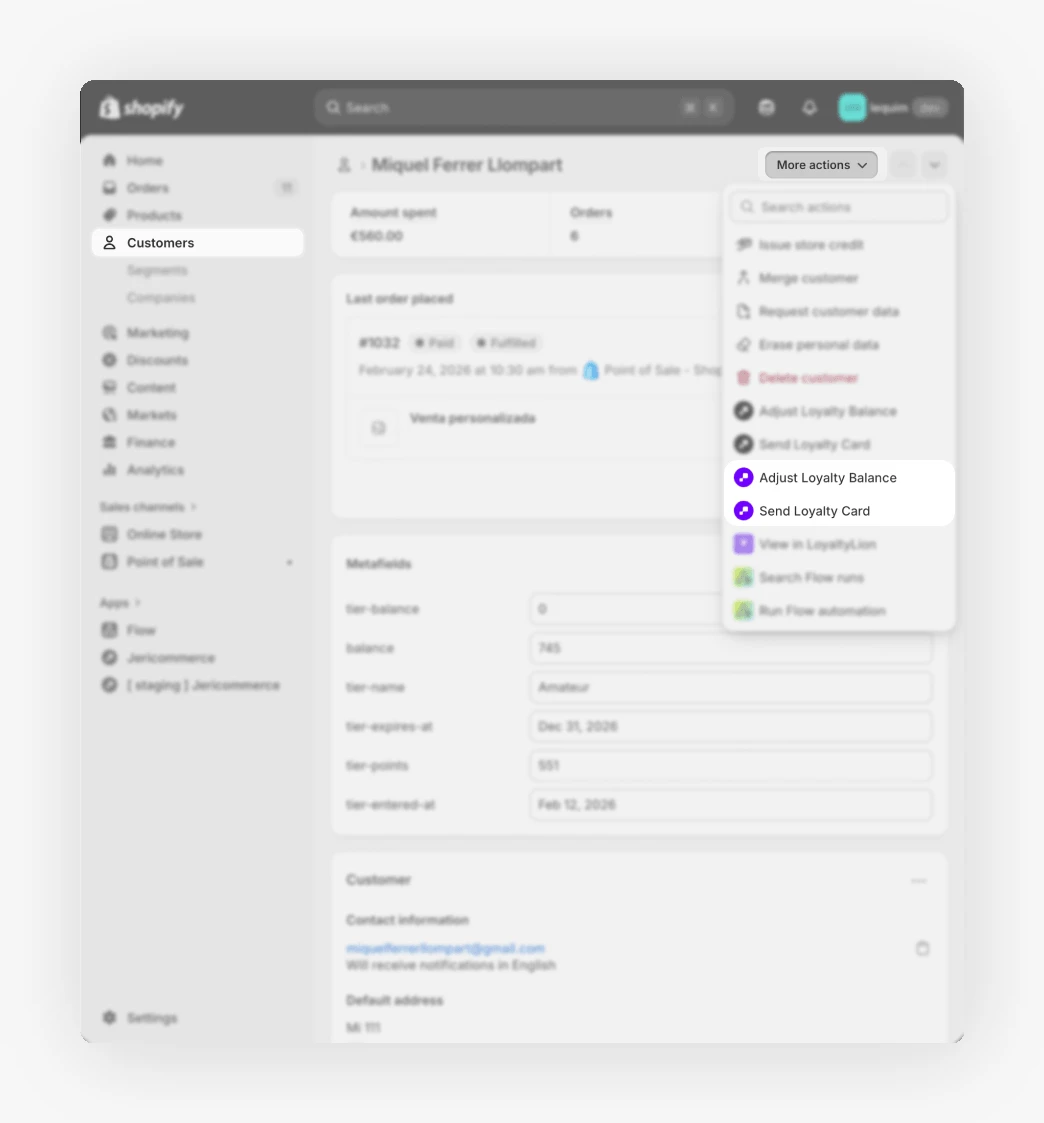
The customer profile also includes two quick actions for the most common support tasks.
Open any customer in Shopify admin, click More actions in the top-right of the profile, and you will see:
- Adjust loyalty balance: increase or decrease the customer's points with a reason
- Send loyalty card: email the customer's wallet pass to their inbox
Before You Start
For the loyalty blocks and actions to show up and work, three things need to be in place:
- The JeriCommerce app is installed on your Shopify store.
- The Shopify integration is connected to your loyalty program. See Shopify Flows and Events for the setup.
- The customer has a JeriCommerce profile and a valid email on their Shopify record.
If any of these are missing, the action shows a clear error message (for example, "Customer not enrolled" or "Customer has no email") so you know what to fix.
Adjust Loyalty Balance
This is the same kind of adjustment you can run from the JeriCommerce dashboard, only faster when you are already inside a customer's Shopify profile, like after handling a support ticket or processing a return.
Open the action
From the customer profile, click More actions → Adjust loyalty balance. A modal opens with the customer's current balance, tier, and member-since date.
Pick increase or decrease
Toggle between Increase and Decrease. The modal shows a live projected balance as you type, so you can see exactly where the customer will land.
Enter the amount and reason
Type the Amount of Points (between 1 and 9,999). Add a Reason in the text area. The reason is required and is saved with the adjustment for your own audit trail.
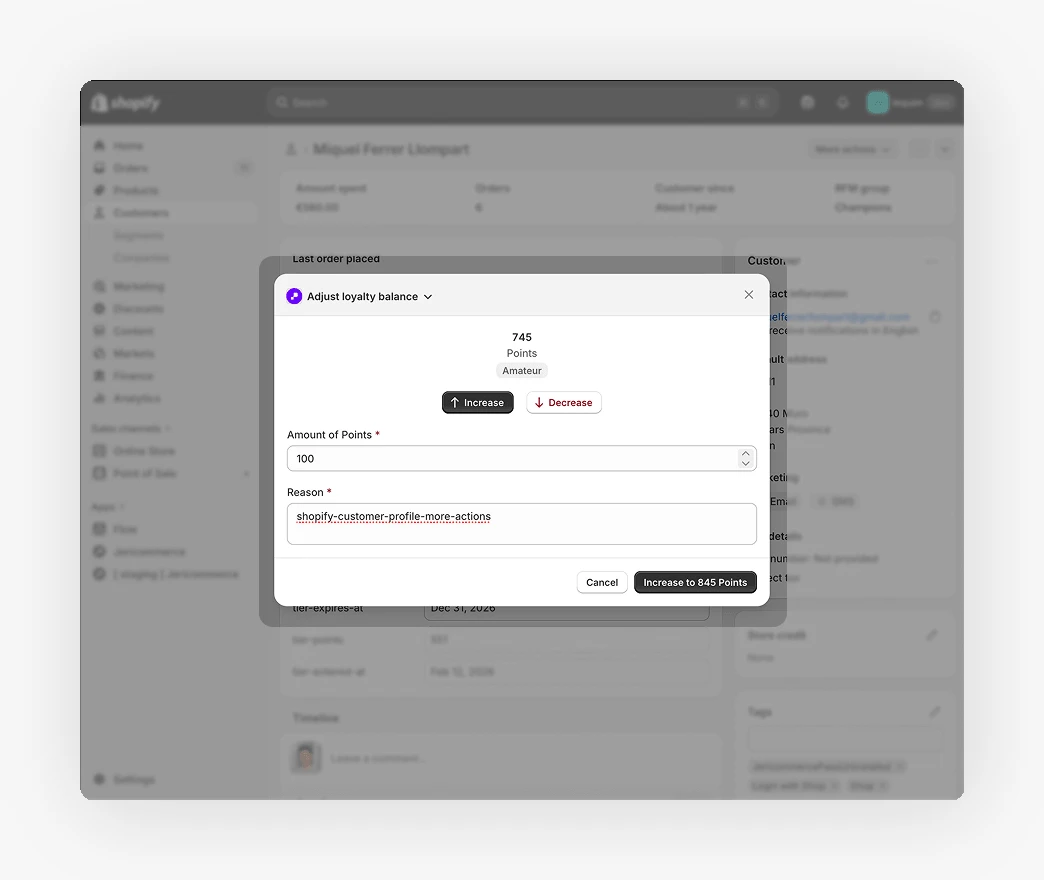
Confirm
Click the confirm button. The balance is updated in JeriCommerce immediately. Shopify customer metafields can take a few minutes to reflect the new value.
For the full set of options for adjusting balance (Shopify Flows, Shopify POS, and the JeriCommerce dashboard), see Adjust Balance from Shopify.
Send Loyalty Card
Use this when a customer asks you to resend their wallet pass, or when you want to onboard a customer who never installed their card.
Open the action
From the customer profile, click More actions → Send loyalty card. A confirmation modal asks you to confirm sending the card to the email on file.
Confirm
Click Send loyalty card. JeriCommerce sends an email to the customer with the install link for their Apple Wallet or Google Wallet pass.
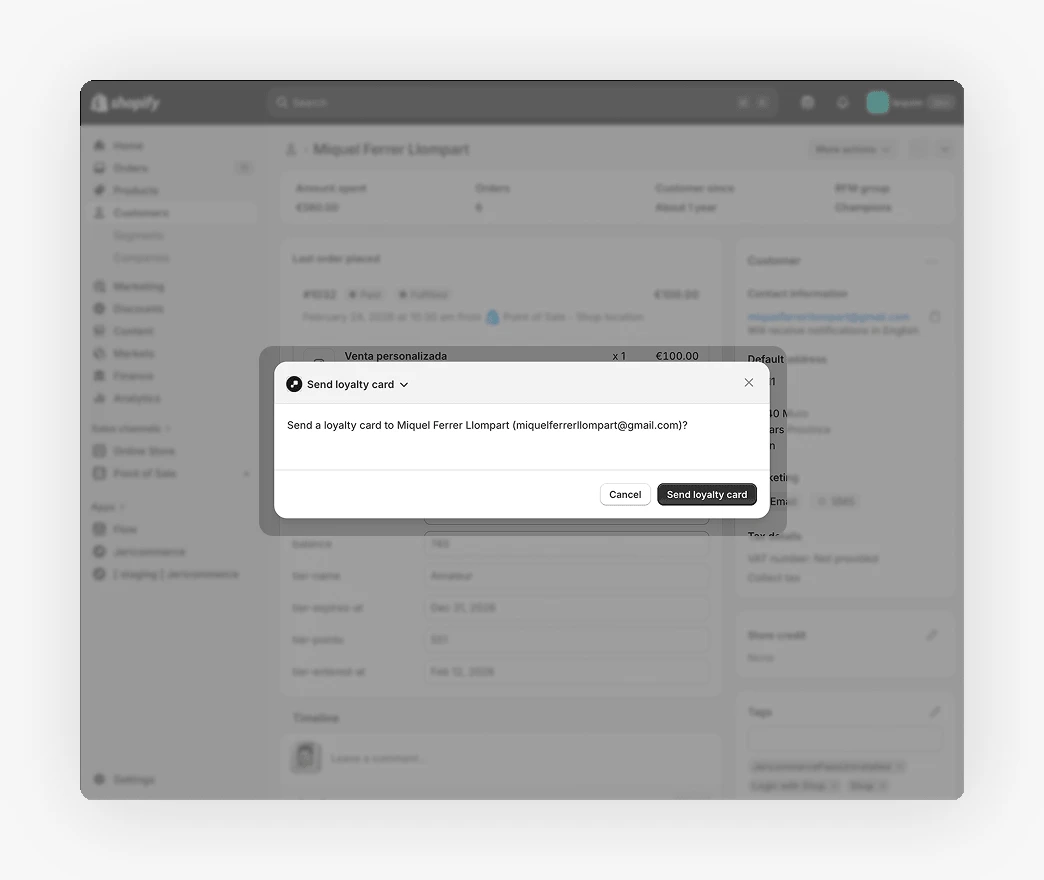
The customer receives the same email template you can preview from Customize wallet emails. If the email bounces or never arrives, check that the customer's email is valid and that their inbox is not filtering JeriCommerce as spam.
What Gets Recorded
Every action you take from the Shopify customer profile is logged in JeriCommerce, the same as if you had done it from the dashboard:
- Balance adjustments appear in the customer's points history with the reason you entered and the staff member who made the change (based on the Shopify session).
- Send card events count toward the customer's wallet pass install funnel and are visible in Analytics.